How to 3D Printer: Complete Industrial Operation Guide for Mold and Hardware Fast Sampling
Author: SZTC
2026-09-28
For plastic mold and hardware processing factories, 3D printers have become essential equipment for rapid prototyping, structural verification and small-batch trial production. Compared with traditional CNC machining and manual mold trial, a qualified industrial 3D printer can deliver functional samples in hours, greatly shortening R&D cycles and cutting trial costs. However, many workshop operators only master basic startup operations and fail to leverage the full potential of industrial printing equipment. The most fundamental question for every manufacturing technician is:how to 3D printer properly to produce high-precision, test-ready mold and hardware prototypes. This article provides a systematic, factory-tailored operational guide covering equipment preparation, parameter setting, printing execution and post-print maintenance for industrial rapid sampling scenarios.
1. Understand Industrial 3D Printer Types for Mold and Hardware Sampling
Before learning how to 3D printer professional workflows, users must distinguish different printer types and their applicable industrial scenarios. Consumer-grade printers focus on appearance printing, while industrial devices are optimized for tolerance stability, structural strength and long-running batch sampling.
1.1 FDM Industrial Printers for Hardware Structural Prototypes
Industrial FDM 3D printers are widely used for fast verification of hardware fixtures, positioning jigs and non-precision structural parts. They support engineering filaments such as PETG, ABS and reinforced nylon, featuring stable stacking and low operating costs. These printers are easy to operate, suitable for daily iterative sampling, and ideal for verifying assembly structures and mechanical fit before formal hardware processing.
1.2 SLA Resin Printers for Plastic Mold Cavity Samples
SLA light-curing printers are the mainstream equipment for plastic mold rapid sampling. With ultra-high layer resolution and smooth surface performance, they can perfectly restore fine mold textures, tiny grooves and complex curved surfaces. Mastering how to 3D printer SLA equipment is critical for simulating injection molding effects, checking demolding feasibility and optimizing mold flow schemes in advance.
1.3 Industrial Metal 3D Printers for High-Strength Mold Inserts
SLM metal printers are used for high-end industrial sampling, including mold steel inserts, conformal cooling channel parts and load-bearing hardware components. With laser melting and inert gas protection systems, they produce fully dense metal parts with mechanical properties consistent with machined workpieces. Although the operation threshold is higher, they are irreplaceable for high-standard functional verification and small-batch trial production.
2. Pre-Print Preparation: Standard Startup and Calibration Workflow
More than 70% of industrial printing defects come from insufficient pre-print preparation. Standardized pre-operation calibration is the core foundation to master how to 3D printer and ensure stable sample quality.
2.1 Daily Equipment Inspection and Cleaning
Before each sampling task, complete full machine inspection. For FDM printers, clean the nozzle to remove residual carbonized materials, check feeding gear smoothness, and wipe the printing platform to ensure flatness and adhesion. For SLA printers, clean residual cured resin on the release film or screen, replace contaminated liquid materials, and confirm normal ultraviolet light power. For metal printers, check powder fluidity, recoater integrity and inert gas system pressure to avoid oxidation and layer defects.
2.2 Platform Leveling and Base Adhesion Adjustment
Unlevel platforms are the leading cause of uneven layer thickness, warping and base peeling. Industrial 3D printers require precise manual or automatic leveling before formal printing. Adjust platform height to ensure uniform gap between nozzle and base, and apply adhesive paste or platform coating for large-size mold and hardware samples. Stable base adhesion guarantees complete molding of long-strip structural parts and large flat cavities.
2.3 Material Selection and Loading Inspection
Match printing materials according to sample usage scenarios. Use high-toughness engineering materials for hardware functional parts, high-precision transparent or tough resin for mold appearance samples, and professional metal powder for high-strength structural prototypes. Check material dryness and expiration date: damp filaments cause bubble layers, deteriorated resin leads to brittle surfaces, and agglomerated metal powder results in uneven melting. Correct material loading and pre-inspection avoid batch defective samples.
3. Model Processing and Slicing: Core Operation of 3D Printer Application
Printer hardware calibration only guarantees equipment status, while slicing and model optimization determine sample precision and performance. This key step defines how to 3D printer for industrial-grade qualified prototypes.
3.1 Industrial Model Repair and DFM Optimization
Original CAD files for CNC machining and mold opening cannot be printed directly. Import STL models into repair software to fix non-watertight meshes, open edges and overlapping surfaces. Follow additive manufacturing rules to adjust unreasonable thin walls, optimize overhang angles above 45 degrees, and remove unprintable tiny structures. For mold samples, reserve standard draft angles; for hardware parts, add rounded transitions to reduce printing stress concentration.
3.2 Scenario-Based Slicing Parameter Setting
Set differentiated parameters for mold and hardware samples. For high-precision plastic mold prototypes, reduce layer height, lower printing speed and enable fine surface mode to restore tiny textures. For hardware load-bearing fixtures, increase infill density and enhance layer bonding strength to meet functional testing requirements. For complex suspended structures, generate reasonable supports, manually optimize support distribution on key assembly surfaces, and reduce post-processing polishing workload.
3.3 Preview and G-Code Export
Complete full-layer preview after slicing to check for missing layers, abnormal stacking and collision risks. Adjust model orientation and nesting layout according to platform size to improve printing efficiency. After confirming no errors, export standard G-Code files compatible with the printer system, and classify and archive files according to project specifications to facilitate repeated sampling and batch production.
4. In-Print Monitoring and Real-Time Adjustment Skills
Standard printing execution and real-time monitoring effectively avoid sample scrapping, which is an essential part of mastering how to 3D printer industrial operations.
4.1 First-Layer Verification and Machine Operation
After starting the printing task, closely observe the first 5 to 10 layers. The base layer adhesion directly determines the success rate of the entire sample. If uneven extrusion, edge warping or offset stacking occurs, pause the machine immediately to adjust platform height and printing speed. Stable base molding lays the foundation for subsequent layer stacking of large mold plates and special-shaped hardware parts.
4.2 Real-Time Defect Judgment and Adjustment
Master common printing problem solutions during operation. Slow down printing speed for obvious layer lines, increase cooling power for warping deformation, and clean nozzle blockage for missing material extrusion. For resin printing, pay attention to liquid level height and light uniformity; for metal printing, monitor gas concentration and temperature changes to prevent oxidation and thermal cracking.
4.3 Completion and Scientific Cooling Processing
Do not demold samples immediately after printing. Thermally accumulated industrial parts require natural cooling and stress relief. FDM hardware parts need sufficient cooling to avoid bending deformation; SLA mold samples need complete static curing; metal printing blanks must be cooled in an inert environment to stabilize internal structure. Scientific cooling ensures dimensional consistency between printed samples and design drawings.
5. Post-Print Processing and Daily Equipment Maintenance
Post-processing determines whether samples meet industrial testing standards, and daily maintenance ensures long-term stable operation of 3D printers.
5.1 Support Removal and Surface Finishing
Remove auxiliary supports with professional tools and trim surface burrs and residual marks. Perform UV curing, sanding and polishing for mold samples to restore smooth cavity surfaces and simulate real injection molding effects. Deburr and polish hardware assembly holes and matching surfaces to ensure accurate assembly and stable functional testing.
5.2 Dimensional Inspection and Quality Confirmation
Use precision calipers and measuring instruments to detect key dimensions, check tolerance accuracy, surface flatness and structural stability. Verify whether the printed mold and hardware samples meet design standards, screen out defective products caused by parameter errors or equipment problems, and record data to optimize subsequent printing schemes.
5.3 Daily Maintenance and Fault Prevention
Complete equipment cleaning and parameter reset after daily work. Replace vulnerable parts regularly, update slicing parameter templates according to material changes, and store printing materials in a dry and constant-temperature environment. Standardized maintenance reduces equipment failure rates, ensures long-term stable output of industrial samples, and improves workshop rapid sampling efficiency.
6. Conclusion
In short, the systematic answer to how to 3D printer for mold and hardware fast sampling covers standardized pre-print calibration, industrial model optimization and slicing, real-time printing monitoring, professional post-processing and long-term equipment maintenance. Industrial 3D printer operation is not simple startup and printing, but a complete set of process-oriented industrial workflows tailored to rapid prototyping needs. Mastering these standardized operations can effectively improve sample qualification rates, shorten product iteration cycles, reduce trial production costs, and provide efficient and reliable rapid verification solutions for modern plastic mold and hardware processing enterprises.


Samuel Song Your service representative
samuel@chnzhongzhu.com WhatsApp:+86 18688963321
Specializing in zinc-aluminum-magnesium alloy die-casting processing, CNC milling, CNC turning, 3D printing, injection molding and sheet metal processing. Manufacturing services.
How to Choose 3D Printer: Ultimate Guide for Hardware and Mold Rapid Sampling
How to 3D Print STL File: Full Industrial Workflow for Mold and Hardware Sampling
Related Article

This guide is written for procurement engineers, maintenance leads and safety teams who need to specify or source machine guards rather than read a safety textbook.
what is the most dangerous part of machines?
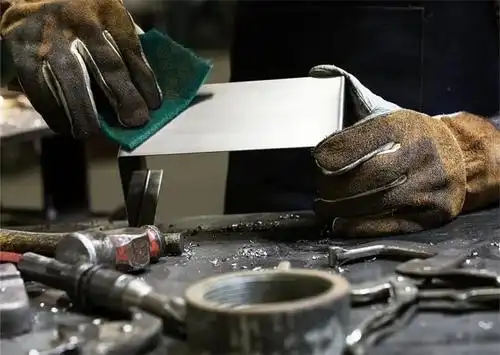
This guide is written for procurement engineers, maintenance leads and safety teams who need to specify or source machine guards rather than read a safety textbook. It covers the hazard points that require protection, the guard types and standards our shop works to, the materials and fabrication options available, the industries they serve, and a selection checklist you can reuse on every guard RFQ.
which parts of a machine must be guarded?
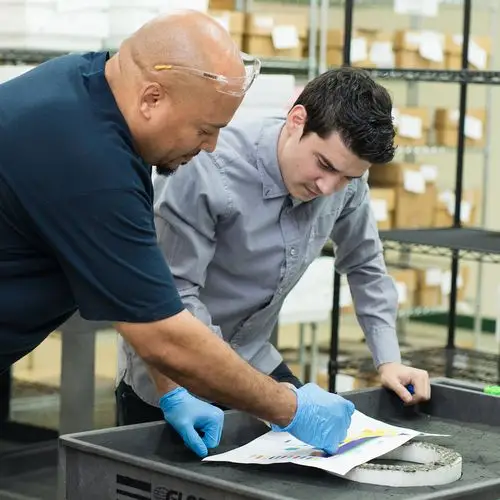
Most buyers do not lose sleep over the dictionary definition of machining. They lose sleep over the practical version: can this supplier hold the tolerance on my drawing, will the material certificate match what I paid for, will the first article pass incoming inspection, and will the parts arrive before the assembly line starts.
What Does Machining Mean?