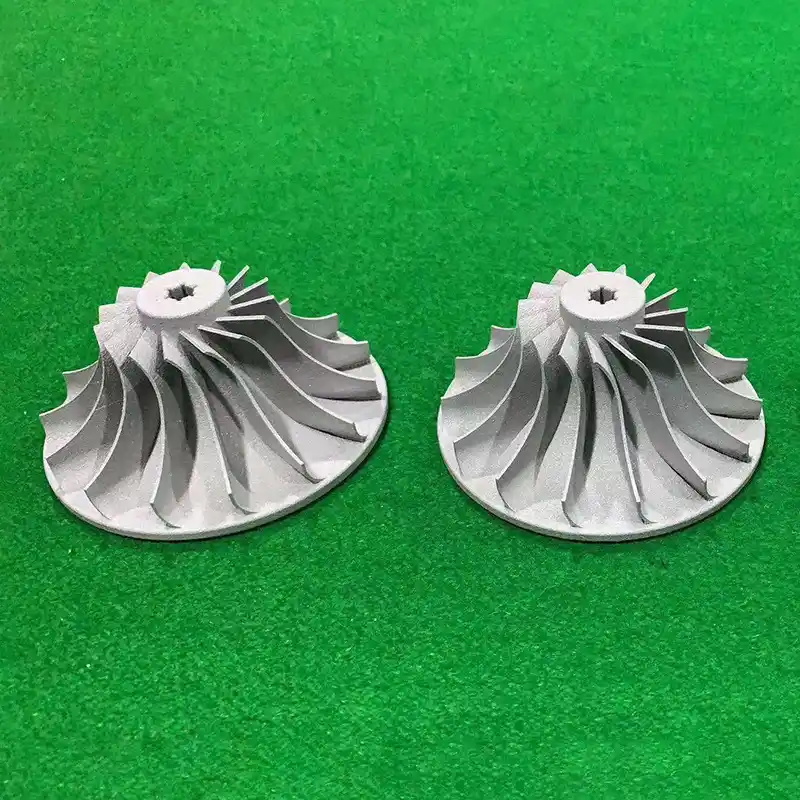
How to 3D Print for Beginners | Step-by-Step Guide for Mold & Hardware Sampling
Author: SZTC
2026-09-21
3D printing has completely transformed rapid prototyping for the plastic mold and hardware processing industries. It allows factory teams to produce custom fixtures, mold inserts, structural prototypes and functional test parts within hours, replacing slow and costly traditional CNC trial machining. For new workshop operators, junior engineers and manufacturing beginners who want to master industrial rapid sampling, one practical question always comes first: how to 3D print for beginners. Many newcomers only understand basic desktop printing but struggle with industrial-grade parameter settings, model optimization and post-processing required for mold and hardware samples. This beginner-friendly guide breaks down the complete industrial 3D printing workflow, helping learners master standardized printing skills for real manufacturing scenarios.
1. Basic Knowledge: Core Principles for Beginner 3D Printing
Before practicing specific operations, beginners need to establish correct industrial printing cognition. Understanding basic principles is the foundation to answer how to 3D print for beginners and avoid frequent printing failures in mold and hardware sampling tasks.
1.1 Understand Common Industrial Printing Technologies
For mold and hardware rapid sampling, three mainstream processes are most widely used and suitable for beginners to learn. FDM printing is simple, low-cost and perfect for non-precision hardware structural jigs and bracket prototypes. SLA resin printing delivers high surface smoothness and fine details, ideal for plastic mold cavity texture verification and appearance samples. SLS and metal printing are advanced industrial processes, which beginners can get familiar with after mastering basic operations. Each technology has unique material characteristics, layer rules and precision ranges, so process selection must match sample usage scenarios.
1.2 Master Basic Printing Materials
Beginners should start with common and stable industrial materials to reduce failure rates. For FDM sampling, PLA and PETG are the best entry-level choices, featuring stable molding and low shrinkage. For SLA mold samples, standard tough resin and high-temperature resin can meet daily structural verification and temperature resistance testing needs. Hardware functional prototypes usually adopt nylon or aluminum alloy materials for strength simulation. Avoid special high-hardness materials in the initial learning stage, as they require complex parameter debugging and increase operational difficulty.
1.3 Distinguish Consumer Printing vs Industrial Sampling
Most beginner failures come from confusing hobby printing with industrial rapid sampling. Desktop consumer printing focuses on appearance decoration, while mold and hardware 3D printing requires strict dimensional tolerance, structural stability and assembly performance. Industrial samples need to withstand strength testing, assembly matching and mold flow verification, so parameter settings, model standards and post-processing requirements are far stricter than ordinary desktop printing.
2. Pre-Print Preparation: Standard Beginner Workflow
Standardized pre-print preparation can solve 80% of beginner printing problems. Mastering these steps is the key foundation of how to 3D print for beginners to achieve qualified industrial samples.
2.1 Model Inspection and Beginner-Friendly Optimization
Most CAD files from mold and hardware design are built for CNC machining or injection molding and cannot be printed directly. Beginners must complete basic model inspection first. Ensure the model is watertight with no open edges, overlapping surfaces or tiny gaps. Repair simple mesh errors through slicing software or lightweight modeling tools. Follow industrial safety standards: reserve wall thickness above 0.8mm for resin samples and above 1.2mm for FDM hardware parts. Avoid ultra-thin structures and sharp overhangs to prevent collapse and deformation during printing.
2.2 Printer Calibration and Equipment Check
Before each printing task, beginners need to complete simple equipment calibration. Level the printing platform to avoid uneven layer thickness, check nozzle or screen cleanliness, and confirm normal material feeding and gas circulation. For resin printers, clean residual cured resin on the screen to prevent pattern defects. For FDM printers, check nozzle clogging to ensure smooth filament output. Simple daily inspection can effectively avoid platform deviation, material breakage and surface printing defects.
2.3 Reasonable Slicing Parameter Settings
Slicing directly determines sample precision and molding effect, which is the core technical point for beginners. Import the repaired STL model into mainstream slicing software such as Cura and Chitubox. For ordinary structural samples, set a conventional layer height to balance speed and precision. For high-precision plastic mold samples, reduce layer height to improve surface smoothness. Arrange printing orientation reasonably: place key assembly surfaces upward to reduce layer line influence. Add necessary supports only for overhanging structures, and avoid excessive supports that increase post-processing difficulty.
3. In-Print Operation: Safe and Stable Printing Steps
Standard in-print operation ensures stable molding of mold and hardware prototypes. Scientific operation specifications help beginners quickly form operational habits and reduce defective rates.
3.1 Test Printing and Initial Observation
After sending the sliced file to the printer, beginners need to observe the first 5 to 10 layers closely. The initial layer adhesion determines the success of the entire print. If warping, offset or missing layers occur, pause and adjust parameters in time. For large-size hardware and mold samples, early layer errors will be amplified in the later stage, leading to overall scrapping. Timely monitoring is the most effective way for beginners to save materials and time costs.
3.2 Real-Time Problem Handling for Common Defects
Beginners only need to master the solutions to frequent industrial printing defects. Minor warping can be improved by adjusting platform temperature and adding adhesion skirts. Layer lines can be optimized by reducing printing speed and increasing model cooling. Local hollowing and incomplete molding are usually caused by blocked material feeding or unreasonable slicing settings. Accumulating simple troubleshooting experience can greatly improve the yield of rapid sampling.
3.3 Complete Printing and Cooling Process
Do not remove the sample immediately after printing is finished. FDM and resin parts need sufficient cooling and curing time to stabilize internal stress and avoid deformation during demolding. Especially for large flat mold plates and long strip hardware fixtures, natural cooling can effectively prevent bending and torsion deformation. Strictly follow the cooling cycle to ensure the dimensional stability of industrial samples.
4. Post-Print Processing: Industrial Finishing for Qualified Samples
For mold and hardware rapid sampling, post-processing determines whether the prototype can be used for formal testing and assembly. This is a necessary step that beginners must master in the full printing workflow.
4.1 Support Removal and Basic Trimming
Gently remove auxiliary supports with professional cutting tools, and trim residual support marks and burrs. For precision mold cavity surfaces, avoid violent cutting to prevent surface damage. For hardware assembly holes and threaded structures, clean residual impurities to ensure smooth matching. Standard trimming ensures the basic appearance and structural integrity of industrial samples.
4.2 Curing, Polishing and Surface Optimization
Resin samples need secondary UV curing to improve surface hardness and stability. For mold samples requiring high surface finish, perform fine sanding and polishing to eliminate layer lines and restore real injection molding texture. Hardware functional parts can be properly polished to remove sharp edges, meeting safety and assembly standards. Beginners do not need complex advanced processes, only standardized basic finishing to meet factory sampling requirements.
4.3 Dimensional Inspection and Quality Confirmation
The final step for beginner printing learning is quality verification. Use calipers to detect key dimensions of mold cavities, hole positions and hardware matching structures, confirm that the tolerance is within the industrial allowable range, and check for surface cracks, deformation and missing materials. Only samples passing dimensional and appearance inspection can be delivered for design verification and customer confirmation.
5. Beginner Advanced Tips for Mold and Hardware Sampling
After mastering basic workflows, beginners can optimize details to improve sampling efficiency and quality, realizing fast and low-cost industrial prototype production.
5.1 Scenario-Based Material Matching
Match materials according to sample purposes: use economical PLA/PETG for hardware structural verification, high-precision resin for plastic mold texture testing, and tough nylon for functional wear-resistant parts. Avoid overusing high-grade materials for simple testing to control sampling costs, and never use low-cost materials for high-strength functional verification.
5.2 Batch Printing and Parameter Accumulation
Beginners can summarize fixed parameter templates for different sampling scenarios. After accumulating stable parameters for mold samples, hardware fixtures and structural parts, they can directly apply mature settings to avoid repeated debugging. Batch nesting of small parts can improve machine utilization and greatly improve daily sampling efficiency.
5.3 Avoid Common Beginner Mistakes
Common errors include directly using unoptimized CNC models, blindly pursuing high printing speed, neglecting cooling and curing, and skipping post-inspection. These problems easily cause sample deformation, dimensional deviation and assembly failure. Standardizing every operation link can effectively reduce rework rates and improve beginner printing proficiency.
6. Conclusion
To sum up, the complete answer to how to 3D print for beginners in mold and hardware industries covers pre-print model optimization and equipment calibration, stable in-print monitoring and adjustment, and standardized post-processing and quality inspection. Different from casual desktop printing, industrial rapid sampling focuses on stability, precision and practicability. Beginners who master standardized workflows can quickly produce qualified mold cavity prototypes and hardware functional samples, effectively shortening product iteration cycles and reducing factory trial production costs. With continuous practice and parameter accumulation, novice operators can grow into professional technical personnel supporting efficient rapid sampling, bringing stable value to modern mold and hardware manufacturing workshops.


Samuel Song Your service representative
samuel@chnzhongzhu.com WhatsApp:+86 18688963321
Specializing in zinc-aluminum-magnesium alloy die-casting processing, CNC milling, CNC turning, 3D printing, injection molding and sheet metal processing. Manufacturing services.
How to 3D Print Metal: Industrial Guide for Hardware and Mold Rapid Sampling
How to 3D Print Design: Complete Guide for Hardware and Plastic Mold Rapid Sampling
Related Article
Machine parts are essential crafting materials in Fortnite: Save the World. They are used to craft weapons and traps, so running short can slow down mission progress.
how to collect machine parts in save the world?
In hardware machining and plastic mold manufacturing, machines use rotating, cutting, pressing, and moving components to shape materials. These parts can create serious hazards if workers come into contact with them during operation.
which of the following machine parts always require guards?