
how does injection molding work?
Author: SZTC
2025-04-14
Injection molding is a manufacturing process that has revolutionized the production of plastic parts. It's a highly efficient method used to create a wide variety of products, from small, intricate components to large, complex structures. Understanding how injection molding works is key to appreciating its versatility and importance in modern manufacturing.

The Machinery Behind Injection Molding
Injection Unit
The injection unit is the heart of the injection molding machine. It's where the magic of melting plastic begins. Plastic pellets, which come in various types such as polyethylene, polypropylene, or ABS, are poured into a hopper. This hopper feeds the pellets into a heated barrel. Inside the barrel, a screw rotates. As it turns, it pushes the plastic pellets forward. The heat from the barrel, combined with the mechanical action of the screw, melts the plastic. The molten plastic then accumulates at the front of the screw, ready to be injected into the mold.
Clamping Unit
Once the plastic is molten, the clamping unit plays a crucial role. This unit is responsible for holding the mold firmly in place during the injection process. The mold consists of two halves - a stationary half and a moving half. The clamping unit applies a significant amount of force to keep these two halves tightly together. This force is necessary to prevent the molten plastic from escaping when it's injected into the mold cavity at high pressure. After the plastic has cooled and solidified, the clamping unit releases the pressure and opens the mold, allowing the finished part to be removed.
Control Unit
The control unit is like the brain of the injection molding machine. It regulates all the operations of the machine. It controls the temperature of the barrel, ensuring that the plastic is melted to the right consistency. The control unit also manages the speed and pressure at which the molten plastic is injected into the mold. Additionally, it determines the cooling time, which is essential for the plastic part to solidify properly. By precisely controlling these parameters, manufacturers can produce high - quality plastic parts with consistent dimensions and properties.
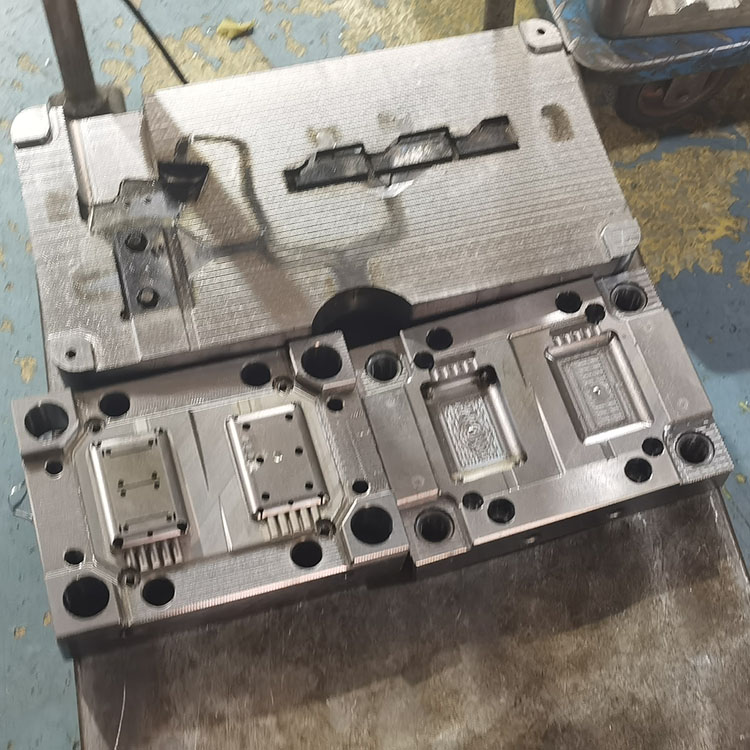
The Step - by - Step Injection Molding Process
Mold Preparation
Design Phase
Before any plastic is molded, a mold needs to be designed. Mold designers use computer - aided design (CAD) software to create a 3D model of the part to be produced. They consider factors such as the part's function, how it will be used, and any specific design requirements. For example, if the part needs to fit with other components, the dimensions must be extremely accurate. Draft angles, which are slight slopes on the part, are also designed into the mold to make it easier to remove the part from the mold once it's formed.
Manufacturing the Mold
Once the design is finalized, the mold is manufactured. Molds are typically made from steel or aluminum due to their durability. The manufacturing process involves machining the mold cavities and cores. The cavities are the hollow spaces in the mold that give the plastic its shape, while the cores are used to create internal features such as holes. The machining is done with high precision to ensure that the mold has the exact dimensions required for the part. After machining, the mold may be polished to create a smooth surface finish on the plastic part or textured to give it a specific look or feel.
Plastic Material Preparation
Drying
Many plastic materials are hygroscopic, meaning they absorb moisture from the air. Moisture in the plastic can cause defects in the final product, such as bubbles or poor surface finish. To prevent this, the plastic pellets are dried before use. This is usually done in a drying oven or a desiccant dryer. The drying time and temperature vary depending on the type of plastic. For example, nylon, which is highly hygroscopic, may need to be dried at a specific temperature for several hours to remove all the moisture.
Adding Colorants and Additives
If the plastic part needs to be a particular color, colorants are added to the plastic material. These can be in the form of masterbatches, which are concentrated mixtures of color pigment and plastic resin. Additives can also be incorporated into the plastic to enhance its properties. For instance, flame retardants can be added to make the plastic more fire - resistant, or antioxidants can be added to prevent the plastic from degrading over time due to exposure to heat or light.
Injection and Solidification
Filling the Mold
With the mold and plastic material prepared, the injection process begins. The injection molding machine is set up, and the molten plastic is injected into the mold cavity at a high pressure. The injection pressure and speed are carefully controlled. If the injection pressure is too low, the mold may not fill completely, resulting in a part with voids or missing sections. On the other hand, if the pressure is too high, the plastic may leak out of the mold along the parting lines, creating a flash.
Packing and Holding
After the mold is filled, a slightly lower pressure, known as the packing pressure, is applied for a short period. This helps to compensate for the shrinkage that occurs as the plastic cools and solidifies. The holding time, during which this pressure is maintained, is also important. If the holding time is too short, the part may not be properly packed, leading to sink marks or dimensional inaccuracies.
Cooling
Once the packing and holding stages are complete, the plastic part is left to cool inside the mold. The cooling time depends on factors such as the thickness of the part and the type of plastic used. Thicker parts generally require longer cooling times to ensure that they solidify evenly. Efficient cooling is crucial for the part to maintain its shape and dimensional stability when it's ejected from the mold.
Part Ejection and Finishing
Ejection
When the plastic part has cooled sufficiently, the clamping unit of the injection molding machine opens the mold. The ejection system, which typically consists of ejector pins or sleeves, then pushes the finished part out of the mold cavity. These ejector elements are strategically placed in the mold to ensure that the part is ejected smoothly without causing any damage.
Trimming and Deburring
After ejection, the plastic part often has some excess material. Runners, which are the channels through which the molten plastic flowed into the mold, and gates, where the plastic entered the mold cavity, need to be trimmed off. Additionally, there may be burrs or rough edges on the part, which can be removed through processes like deburring, sanding, or polishing.
Secondary Operations
In some cases, the plastic part may require additional secondary operations. This could include painting the part to give it a specific color or finish, plating it to add a metallic look or improve its corrosion resistance, printing labels or instructions on it, or assembling it with other components. For example, a plastic toy may need to be painted with bright colors and assembled with small electronic components to make it functional.
Injection molding is a complex yet highly efficient process. It allows for the mass production of high - quality plastic parts with consistent results. Whether it's in the automotive, consumer goods, or medical industries, the applications of injection molding are vast, and its importance in modern manufacturing cannot be overstated.

How Much Does Injection Molding Cost? A Comprehensive Breakdown
What is Plastic Injection Molding?
Related Article

Fast sampling is the fastest way to win business in the hardware machining and plastic mold industries. Customers want a working sample in days, and a 3D printer delivers it, but only when you know how to print in 3d correctly.
how to print in 3d

Fast sampling is the fastest way to win business in the hardware machining and plastic mold industries. Customers often send an STL file and expect a working sample in days.
how to print an stl file

