How to Paint Aluminum Alloy Rims
Author: SZTC
2025-04-09
Introduction
Aluminum alloy rims can enhance the appearance of your vehicle. Painting them in a custom color is a great way to add a personal touch. However, the process requires some careful steps to ensure a long - lasting and professional - looking finish. In this blog, we will guide you through the entire process of painting aluminum alloy rims.

Preparation
Gather Materials
- Paint: Select a high - quality automotive paint that is suitable for aluminum surfaces. You can choose from spray paints, which are convenient for DIY projects, or enamels for a more durable finish. Make sure to get a primer as well, which helps the paint adhere better.
- Tools: You will need sandpaper in various grits (such as 180, 320, 600, and 1000), a wire brush, masking tape, plastic sheeting, a paint sprayer (if using spray - on paint), or paintbrushes and rollers (for enamel paint), degreaser, and safety equipment like gloves, goggles, and a respirator.
- Rims: Remove the rims from the vehicle. This is crucial as it allows you to work on them more easily and safely. Use a lug wrench to loosen and remove the lug nuts, and then carefully lift the rim off the vehicle.

Clean the Rims
- Degreasing: First, use a degreaser to clean the rims thoroughly. Aluminum alloy rims can accumulate brake dust, oil, and dirt over time. Spray the degreaser onto the rim surface and use a clean cloth or sponge to scrub. Rinse the rims with water and let them dry completely.
- Wire Brushing: After degreasing, use a wire brush to remove any rust, corrosion, or old paint flakes. Pay attention to the edges and hard - to - reach areas. Be careful not to scratch the rim too harshly.
- Coarse Sanding: Start with 180 - grit sandpaper. Sand the entire surface of the rim to rough it up. This helps the primer and paint adhere better. Sand in a circular motion, covering all areas of the rim, including the spokes and the outer edge.
- Medium Sanding: Switch to 320 - grit sandpaper to smooth out the surface further. This step helps to remove any deeper scratches or imperfections left by the 180 - grit sandpaper.
- Fine Sanding: Finish with 600 - or 1000 - grit sandpaper for a very smooth surface. This fine - sanding step is crucial for achieving a professional - looking finish.
Painting Process
Priming
- Masking: Before priming, use masking tape and plastic sheeting to cover areas that you don't want to be painted, such as the tire bead seat and the center hub area where the wheel attaches to the vehicle.
- Applying Primer: If using a spray can, shake it well for at least a minute. Hold the can about 6 - 8 inches away from the rim surface and apply an even coat of primer. Start from the center of the rim and work your way outwards. Let the primer dry according to the manufacturer's instructions, which is usually around 15 - 30 minutes. You may need to apply 2 - 3 coats of primer for better coverage.

- Choosing the Paint Application Method:
- Spray Paint: If using spray paint, follow the same shaking and distance - holding instructions as for the primer. Apply the paint in light, even coats. Start with a thin coat and let it dry for a few minutes. Then apply additional coats until you achieve the desired color intensity. Be careful not to apply too much paint at once, as this can cause runs and drips.
- Enamel Paint: If using enamel paint, pour it into a paint tray. Dip a paintbrush or roller into the paint and apply it to the rim. Start from the edges and work your way towards the center. Use smooth, even strokes. Enamel paint may require more coats compared to spray paint, and it usually takes longer to dry between coats.
- Drying Time: After painting, let the rims dry completely. This can take several hours or even overnight, depending on the type of paint used and the environmental conditions. Avoid touching the painted surface during this time to prevent smudging.
Clear Coating (Optional but Recommended)
- Applying a clear coat can add extra protection and shine to the painted rims. Follow the same masking process as for priming. Then, use a clear - coat spray can or apply clear enamel in the same way as the color paint. Apply 2 - 3 coats of clear coat, allowing each coat to dry before applying the next.
Finishing Touches
Removing Masking
Once the paint and clear coat (if applied) are completely dry, carefully remove the masking tape and plastic sheeting. Be gentle to avoid chipping the paint.
Re - installing the Rims
After the rims are painted and dried, reinstall them on the vehicle. Tighten the lug nuts in a star - pattern to ensure even tension. Make sure the rims are properly aligned before driving.
Conclusion
Painting aluminum alloy rims can be a rewarding DIY project. By following these steps carefully, from proper preparation to the final clear - coating (if desired), you can transform the look of your vehicle's rims. Remember to take your time, work in a well - ventilated area, and use the right materials for the best results.
Tapping and Threading
Related Article
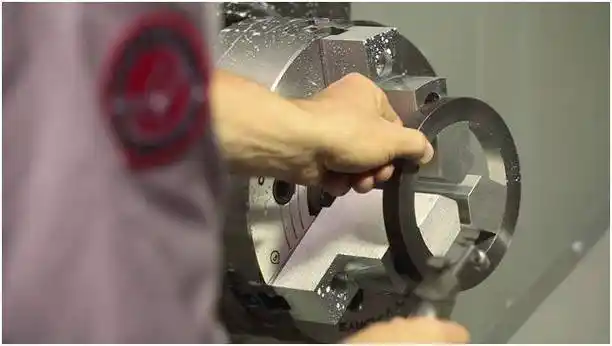
Deformation control refers to the process of minimizing bending or flexing in materials during manufacturing or operation. This process is essential for ensuring product quality and reliability, and deformation control methods include altering the composition of materials or implementing design changes. Deformation control is essential in various industries, including automotive, aerospace, and construction, where bending or flexing in materials can compromise safety and durability.
Guarantee Of Machining Accuracy Of Thin-Walled Plate-Shaped Die Castings Based On Deformation Control